MyEvent.com allows you to post YOUR
photos on several pages of your website, in addition to the Slideshow.
Uploading Photos to a Regular Page
Step 1:
You can add pictures and text to any page on your website. (Each paragraph can have one picture. You can have up to 120 paragraphs per page).
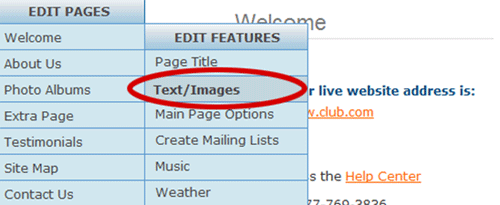
In the control panel, click on any page under EDIT PAGES and then click on Text/Images under EDIT FEATURES.
Step 2:
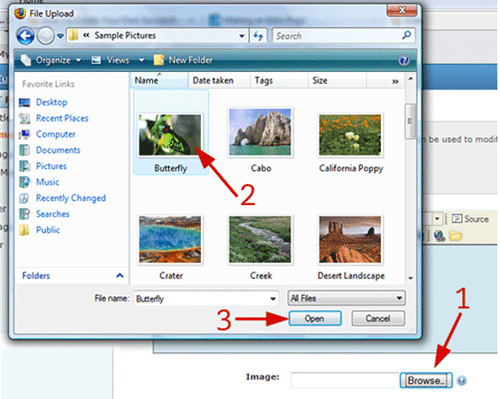
- Click on the Browse button.
- Select a picture on your computer.
- Click on Open.
Step 3:
Before you upload the picture:
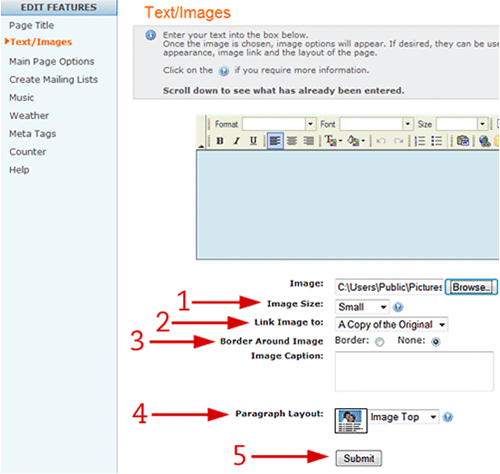
- You can also select if you want the size of the picture to appear small, medium or large by choosing from the dropdown menu next to "Image Size".
- You can choose if you want to link the image to another website by choosing from the dropdown menu next to "Link Image To".
- You can select if you want the picture to have a border or if you want to add a caption.
- You can select if you want the picture to the left, right or center of your text by choosing from the dropdown menu next to "Paragraph Layout".
- Click Submit.
Uploading Photos to a Photo Album
Step 1
If you do not have any albums created, you must first create them.
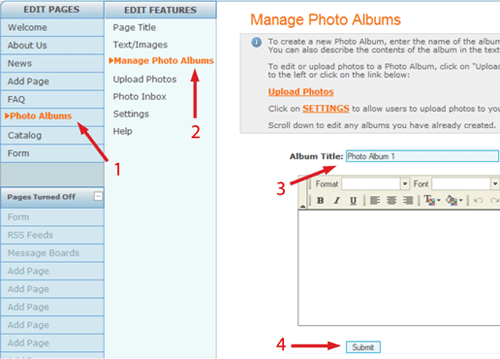
- Go to the Photo Albums page in your control panel.
- Click on Manage Photo Albums.
- Name the album.
- Submit.
Step 2
Go to the Photo Albums page (Manage Photos section) in your control panel and click on Upload Photos.
- Select the album you want to upload to from the drop down menu.
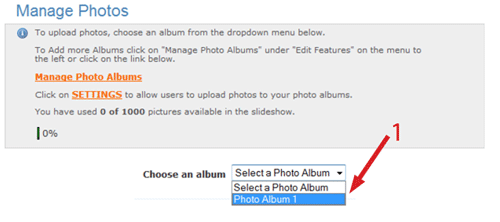
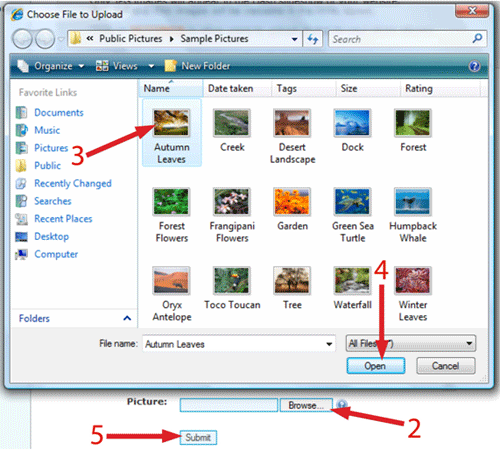
- Click on Browse.
- Locate the photo on your computer, select it.
- Click on Open.
- Click on Submit.
Multiple Picture Upload
If you would like to upload several pictures you have saved in your computer to a photo album, please follow these steps:
Step 1
If you do not have any albums created, you must first do so. You can create several albums.
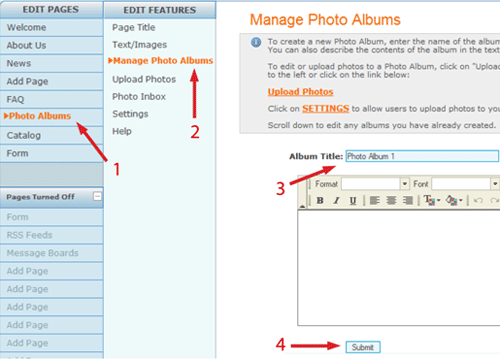
- Go to the Photo Albums page in your control panel.
- Click on Manage Photo Albums.
- Name the album.
- Click on Submit.
Step 2
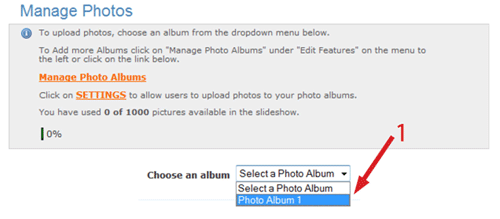
Go to the Photo Albums page in your control panel and click on Upload Photos. Select the album you want to upload to from the drop down menu.
Step 3
There you will see an option to upload multiple photos at one time. Click on its link.
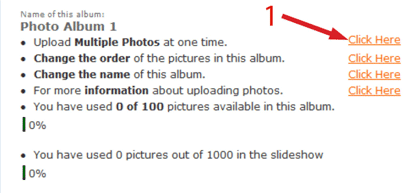
Step 4
- Click on Add and search your computer for photos to upload. This will open a window in which you will see the files on your computer.
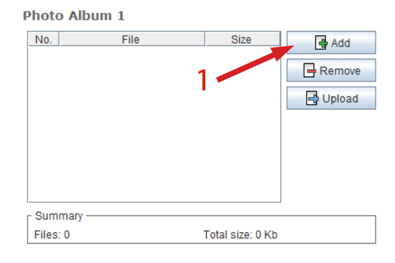
- Navigate to the folder where your photos are. Holding down the "Ctrl" button, highlight several photos at once by clicking on them.
- Click on Open.
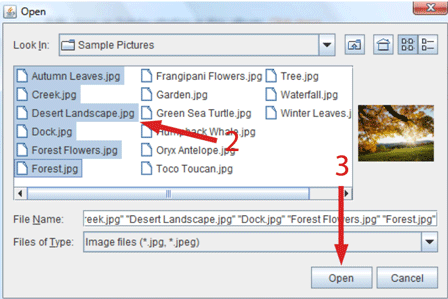
- Click on Upload.
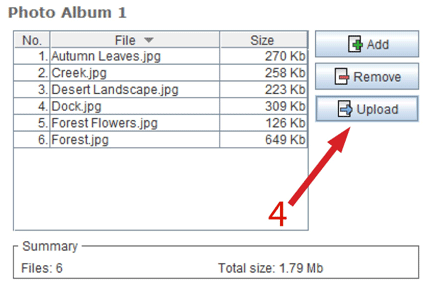
Uploading Photos to Your Catalog
When entering an item to be listed in the catalog, you can include an image.
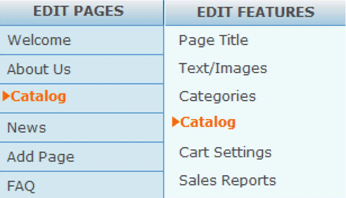
- Go to the Catalog page in your control panel then click on Catalog.
-
Click on the image Browse button.
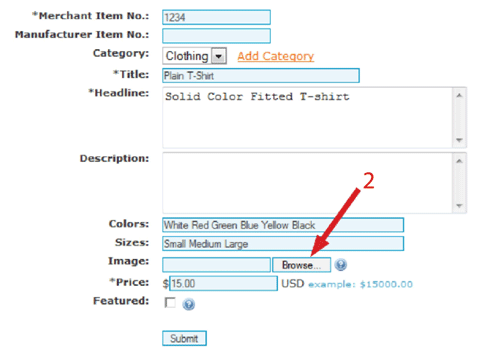
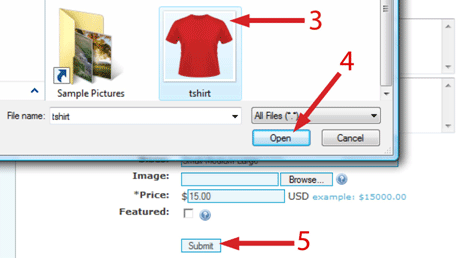
- Locate the photo on your computer, select it.
- Click on Open.
- Click on Submit.
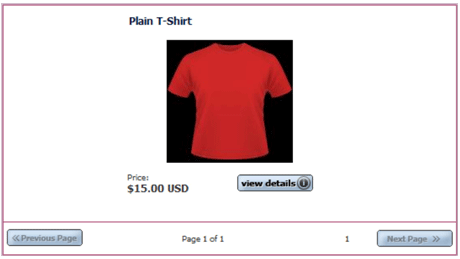
- The item will then be listed in your catalog on the website.
Cropping an Image
If you do not have software on your computer that will enable you to crop your photos, you can go to http://paint.net/ to download one.
Paint.NET is a free image and photo editing software for computers that run Windows.
- Once you"ve download and installed the Paint.net software, click on its icon on your desktop.
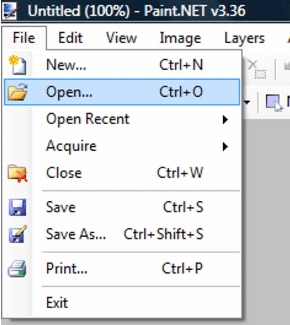
- Click on File, the Open.
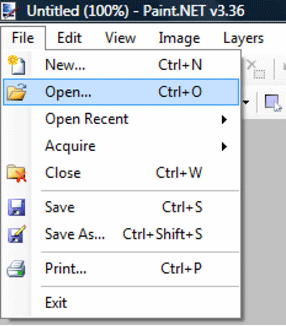
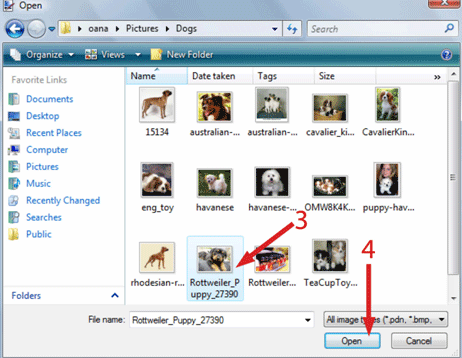
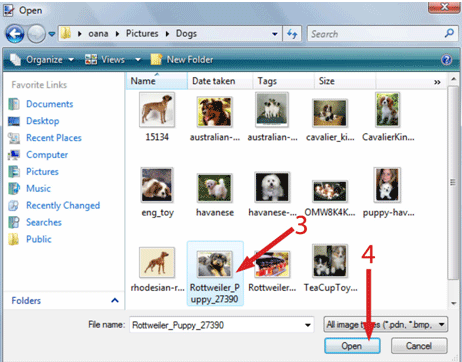
- Locate the photo on your computer, select it.
- Click on Open.
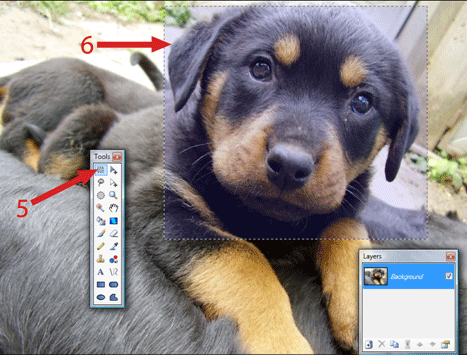
- Click on Rectangle select on the Tools Window.
- Select the area of the photo you want to crop.
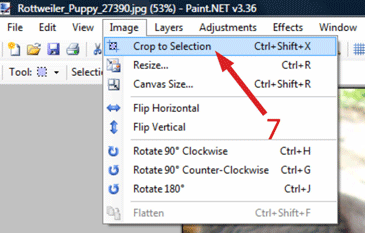
- Click on Image then on Crop Selection.
- Click on File and save the new image.
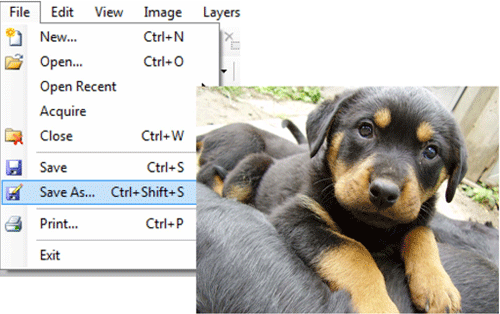
Image Formats
There are several types of image formats that photos can be saved as (GIF, PNG, TIFF, JPEG, etc).
The slideshow feature on the Photo Album page will only show photos saved as JPEGs. Follow these steps to convert photos saved in other formats to JPEG:
- Open Paint.net
- Click on File, the Open.
- Locate the photo on your computer, select it.
- Click on Open.
- Click on File, then Save As.
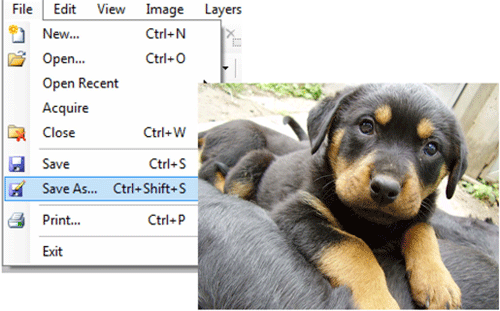
- Name the File.
- Under Save as type, select JPEG.
- Take note of where you are saving the photo on your computer then click on Save.

